Natalia Vinogradova
Senior Blog Editor AT Vsble
View all authors

Best Website Builder for Visual Creators - Top Picks for 2025

· 15 min read
Natalia Vinogradova
Senior Blog Editor AT Vsble

A modern laptop showing a vibrant online portfolio.

Enhancing Your Online Presence for Success

In the digital landscape of 2025, having a striking portfolio website is not just a choice for visual creators; it is crucial for success. Your online portfolio acts as a continuous display of your creative projects, drawing in potential clients and opportunities worldwide.

Why a Portfolio Website Matters in 2025:

  • Creates a professional first impression
  • Showcases your unique artistic style
  • Builds credibility in your industry
  • Enables direct client connections
  • Drives business growth through digital presence

The right website builder can transform your creative vision into a captivating online portfolio. Today's platforms offer specialized features for artists, photographers, videographers, and designers - making it easier than ever to build a professional website without coding knowledge.

These portfolio website builders stand out with:

  • Pre-designed templates that complement visual work
  • Intuitive drag-and-drop interfaces
  • Gallery features optimized for high-resolution images
  • Video hosting capabilities
  • Mobile-responsive designs

Whether you're a seasoned professional or just starting your creative journey, choosing the right easy website builder is crucial. We've analyzed the top website creators specifically designed for visual artists, comparing their features, usability, and value to help you make an informed decision for your digital portfolio. To further enhance your portfolio's functionality and expand its potential, consider leveraging Vsble's vast integrations, which allow you to connect your favorite tools with your portfolio website seamlessly.

Key Features Visual Creators Need in a Website Builder​

Creating a standout online presence requires specific features tailored to showcase visual work effectively. Here's what visual creators should look for in a website builder:

1. Stunning Templates & Design Freedom​

  • Pre-designed layouts optimized for portfolios and galleries
  • Custom color schemes and typography options
  • Flexible grid systems for image arrangements
  • Advanced image editing tools built into the platform

2. Intuitive Drag-and-Drop Interface​

  • No coding knowledge required
  • Real-time preview of changes
  • Quick content updates and rearrangement
  • Built-in image optimization tools

3. SEO Tools for Enhanced Visibility​

Visual creators should prioritize website builders that offer robust SEO tools for enhanced visibility. These include:

  • Custom meta descriptions and titles
  • Alt text options for images
  • XML sitemap generation
  • URL customization capabilities

4. Mobile-First Design​

  • Automatic responsive adjustments
  • Touch-friendly navigation
  • Fast loading speeds on all devices
  • Image scaling for different screen sizes

5. E-commerce Integration​

  • Secure payment processing
  • Digital download capabilities
  • Product variant options
  • Shopping cart customization
  • Inventory management tools
  • High-resolution image support
  • Video embedding capabilities
  • Password protection options
  • Client proofing tools
  • Watermarking capabilities

These essential features enable visual creators to build professional websites that showcase their work effectively while maintaining full control over their online presence.

Top Website Builders for Visual Creators in 2025​

The digital landscape in 2025 demands sophisticated tools that empower visual creators to showcase their work effectively. Let's explore the leading website builders that stand out for their creative capabilities.

1. Squarespace: Elegant Design and Commerce Integration​

Squarespace has established itself as the go-to platform for visual creators seeking professional-grade portfolio websites. The platform's design-first approach resonates with artists, photographers, and designers who prioritize aesthetic excellence.

Key Features:​

  • Award-winning templates with gallery-focused layouts
  • Dynamic content blocks for customizable portfolio presentations
  • Built-in online store functionality for digital and physical artwork
  • Social media integration for Instagram feeds and Pinterest boards
  • Newsletter tools for audience engagement
  • Professional email marketing capabilities

Standout Elements:​

  • Image-focused layouts with high-resolution display options
  • Advanced gallery features including slideshow and grid arrangements
  • Custom CSS capabilities for unique design modifications
  • Mobile-optimized galleries that maintain image quality across devices

Pros:​

  • Stunning visual presentation
  • Professional-grade templates
  • Integrated e-commerce solutions
  • Reliable customer support
  • Regular platform updates

Cons:​

  • Higher pricing compared to competitors
  • Limited customization without CSS knowledge
  • Restricted third-party integrations
  • Learning curve for advanced features

Squarespace's platform particularly shines in its ability to handle large image collections while maintaining site performance. The built-in image optimization ensures quick loading times without compromising visual quality—a crucial feature for photographers and digital artists.

The platform's commerce features enable creators to sell prints, digital downloads, and commissioned work directly through their portfolio sites. The integration with print-on-demand services streamlines the fulfillment process for artists selling physical products.

2. Wix: Customization and Marketing Powerhouse​

Wix is a versatile platform that gives visual creators complete control over their designs. With its wide range of customization options, artists can create one-of-a-kind digital spaces that perfectly capture their artistic vision.

Key Features:​

  • 900+ Industry-Specific Templates: Pre-designed layouts for photographers, artists, designers, and other creative professionals
  • AI-Powered Design Assistant: Wix ADI analyzes your needs and creates a personalized website within minutes
  • Advanced SEO Tools: Built-in features for optimizing image alt text, meta descriptions, and custom URLs
  • Marketing Suite: Email campaigns, social media tools, and analytics dashboard
  • Membership Areas: Create exclusive spaces for client galleries, premium content, or community engagement

Pros:​

  • Complete design freedom with pixel-perfect positioning
  • Robust app market for extended functionality
  • Built-in video hosting capabilities
  • Regular platform updates and new feature releases
  • Professional business tools including invoicing and scheduling

Cons:​

  • Template switching requires complete redesign
  • Advanced features can impact loading speed
  • Higher-tier plans needed for premium functionality
  • Learning curve for extensive customization options

Wix's Editor X platform caters specifically to professional designers, offering responsive design controls and custom breakpoints for creating sophisticated portfolio websites. The platform's integrated CRM system helps visual creators manage client relationships, while the Wix Owner app enables on-the-go website management and real-time notifications.

3. Shopify: Advanced E-Commerce for Serious Sellers​

Shopify is the preferred platform for visual creators looking to grow their business with powerful e-commerce features. This platform offers advanced selling tools and options for showcasing artwork, making it perfect for creators who want to prioritize both sales and visual appeal.

Key Features for Visual Creators:​

  • Advanced Product Display: Showcase artwork through 3D models, AR previews, and multiple image angles
  • Professional Checkout: Customizable checkout pages with abandoned cart recovery
  • Shipping Solutions: Built-in shipping calculator and discounted rates through Shopify Shipping
  • Inventory Management: Real-time tracking across multiple sales channels
  • App Integration: Specialized tools like Artplacer for virtual gallery creation

Pros:​

  • Comprehensive analytics and sales reporting
  • Multi-currency support for international sales
  • Secure payment processing with 100+ payment gateways
  • Built-in marketing tools for email campaigns and social selling
  • Extensive app marketplace for additional functionality

Cons:​

  • Higher monthly costs compared to basic website builders
  • Transaction fees on external payment gateways
  • Limited free themes for artists
  • Steeper learning curve for beginners

The platform's Print-on-Demand integrations allow artists to sell physical products without holding inventory, while the Digital Downloads feature enables immediate delivery of digital art pieces. Shopify's robust API connections support seamless integration with social media marketplaces, expanding reach across Instagram, Facebook, and TikTok shopping channels.

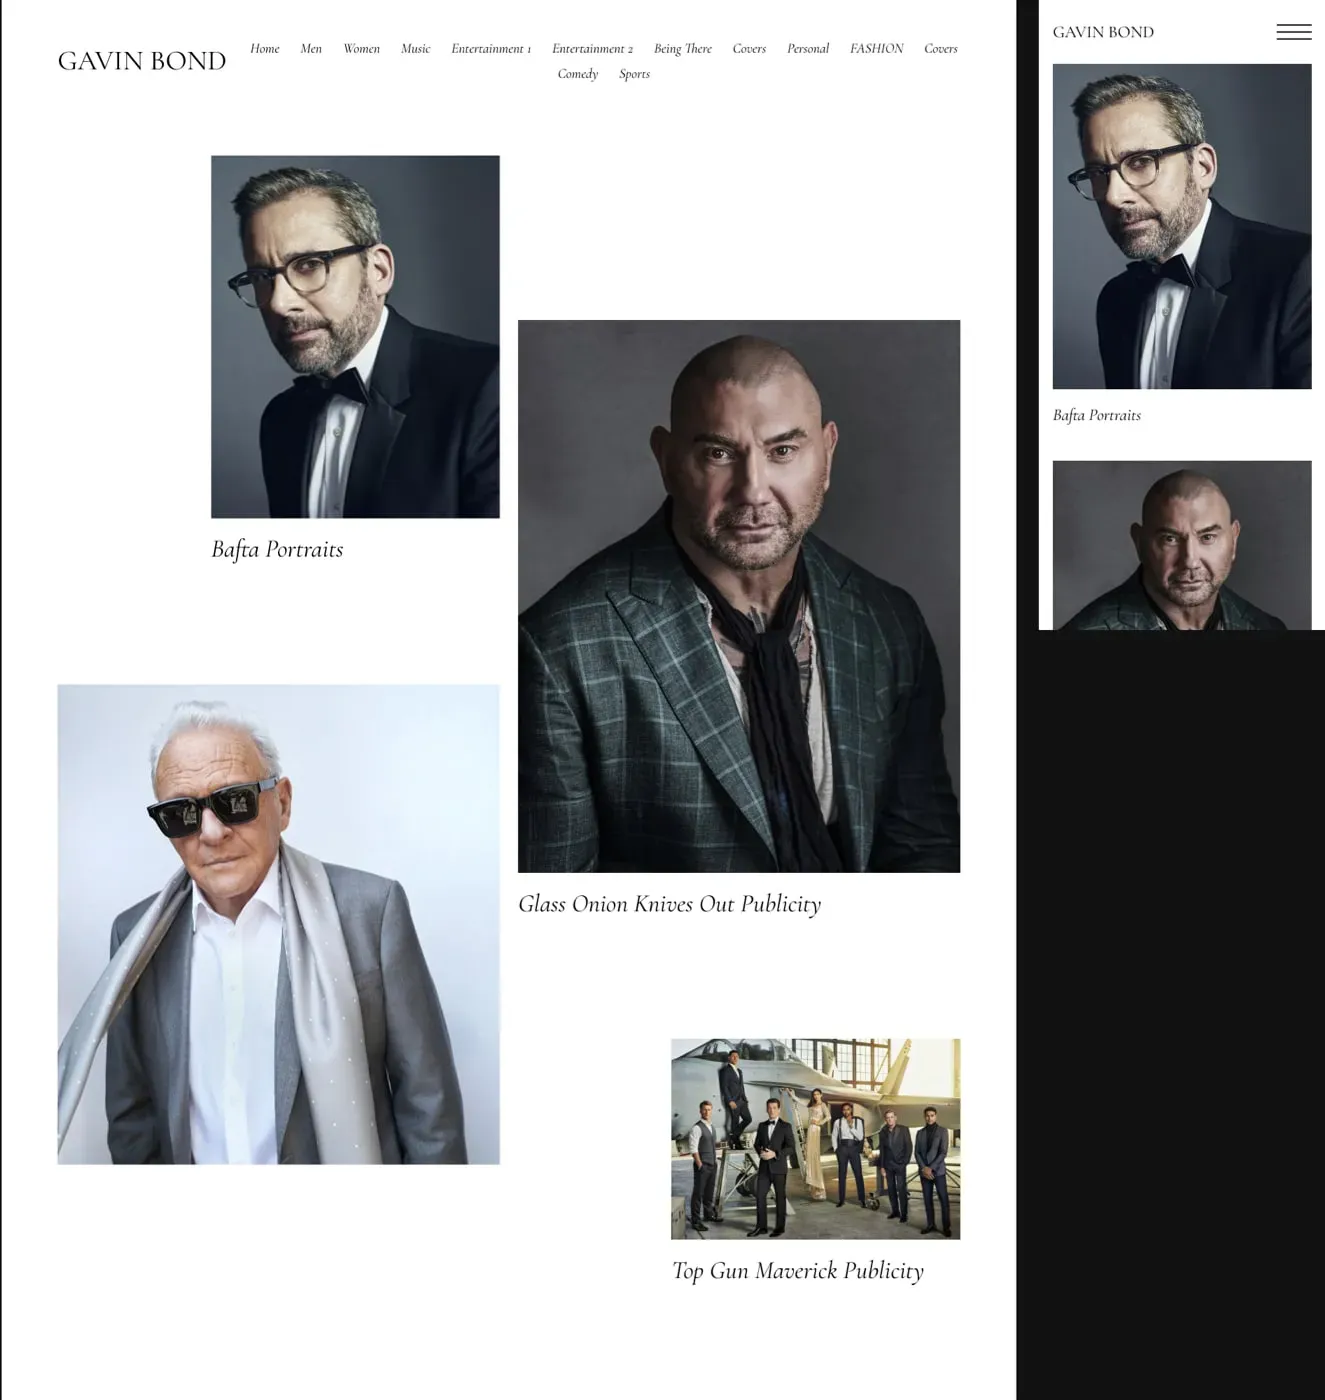
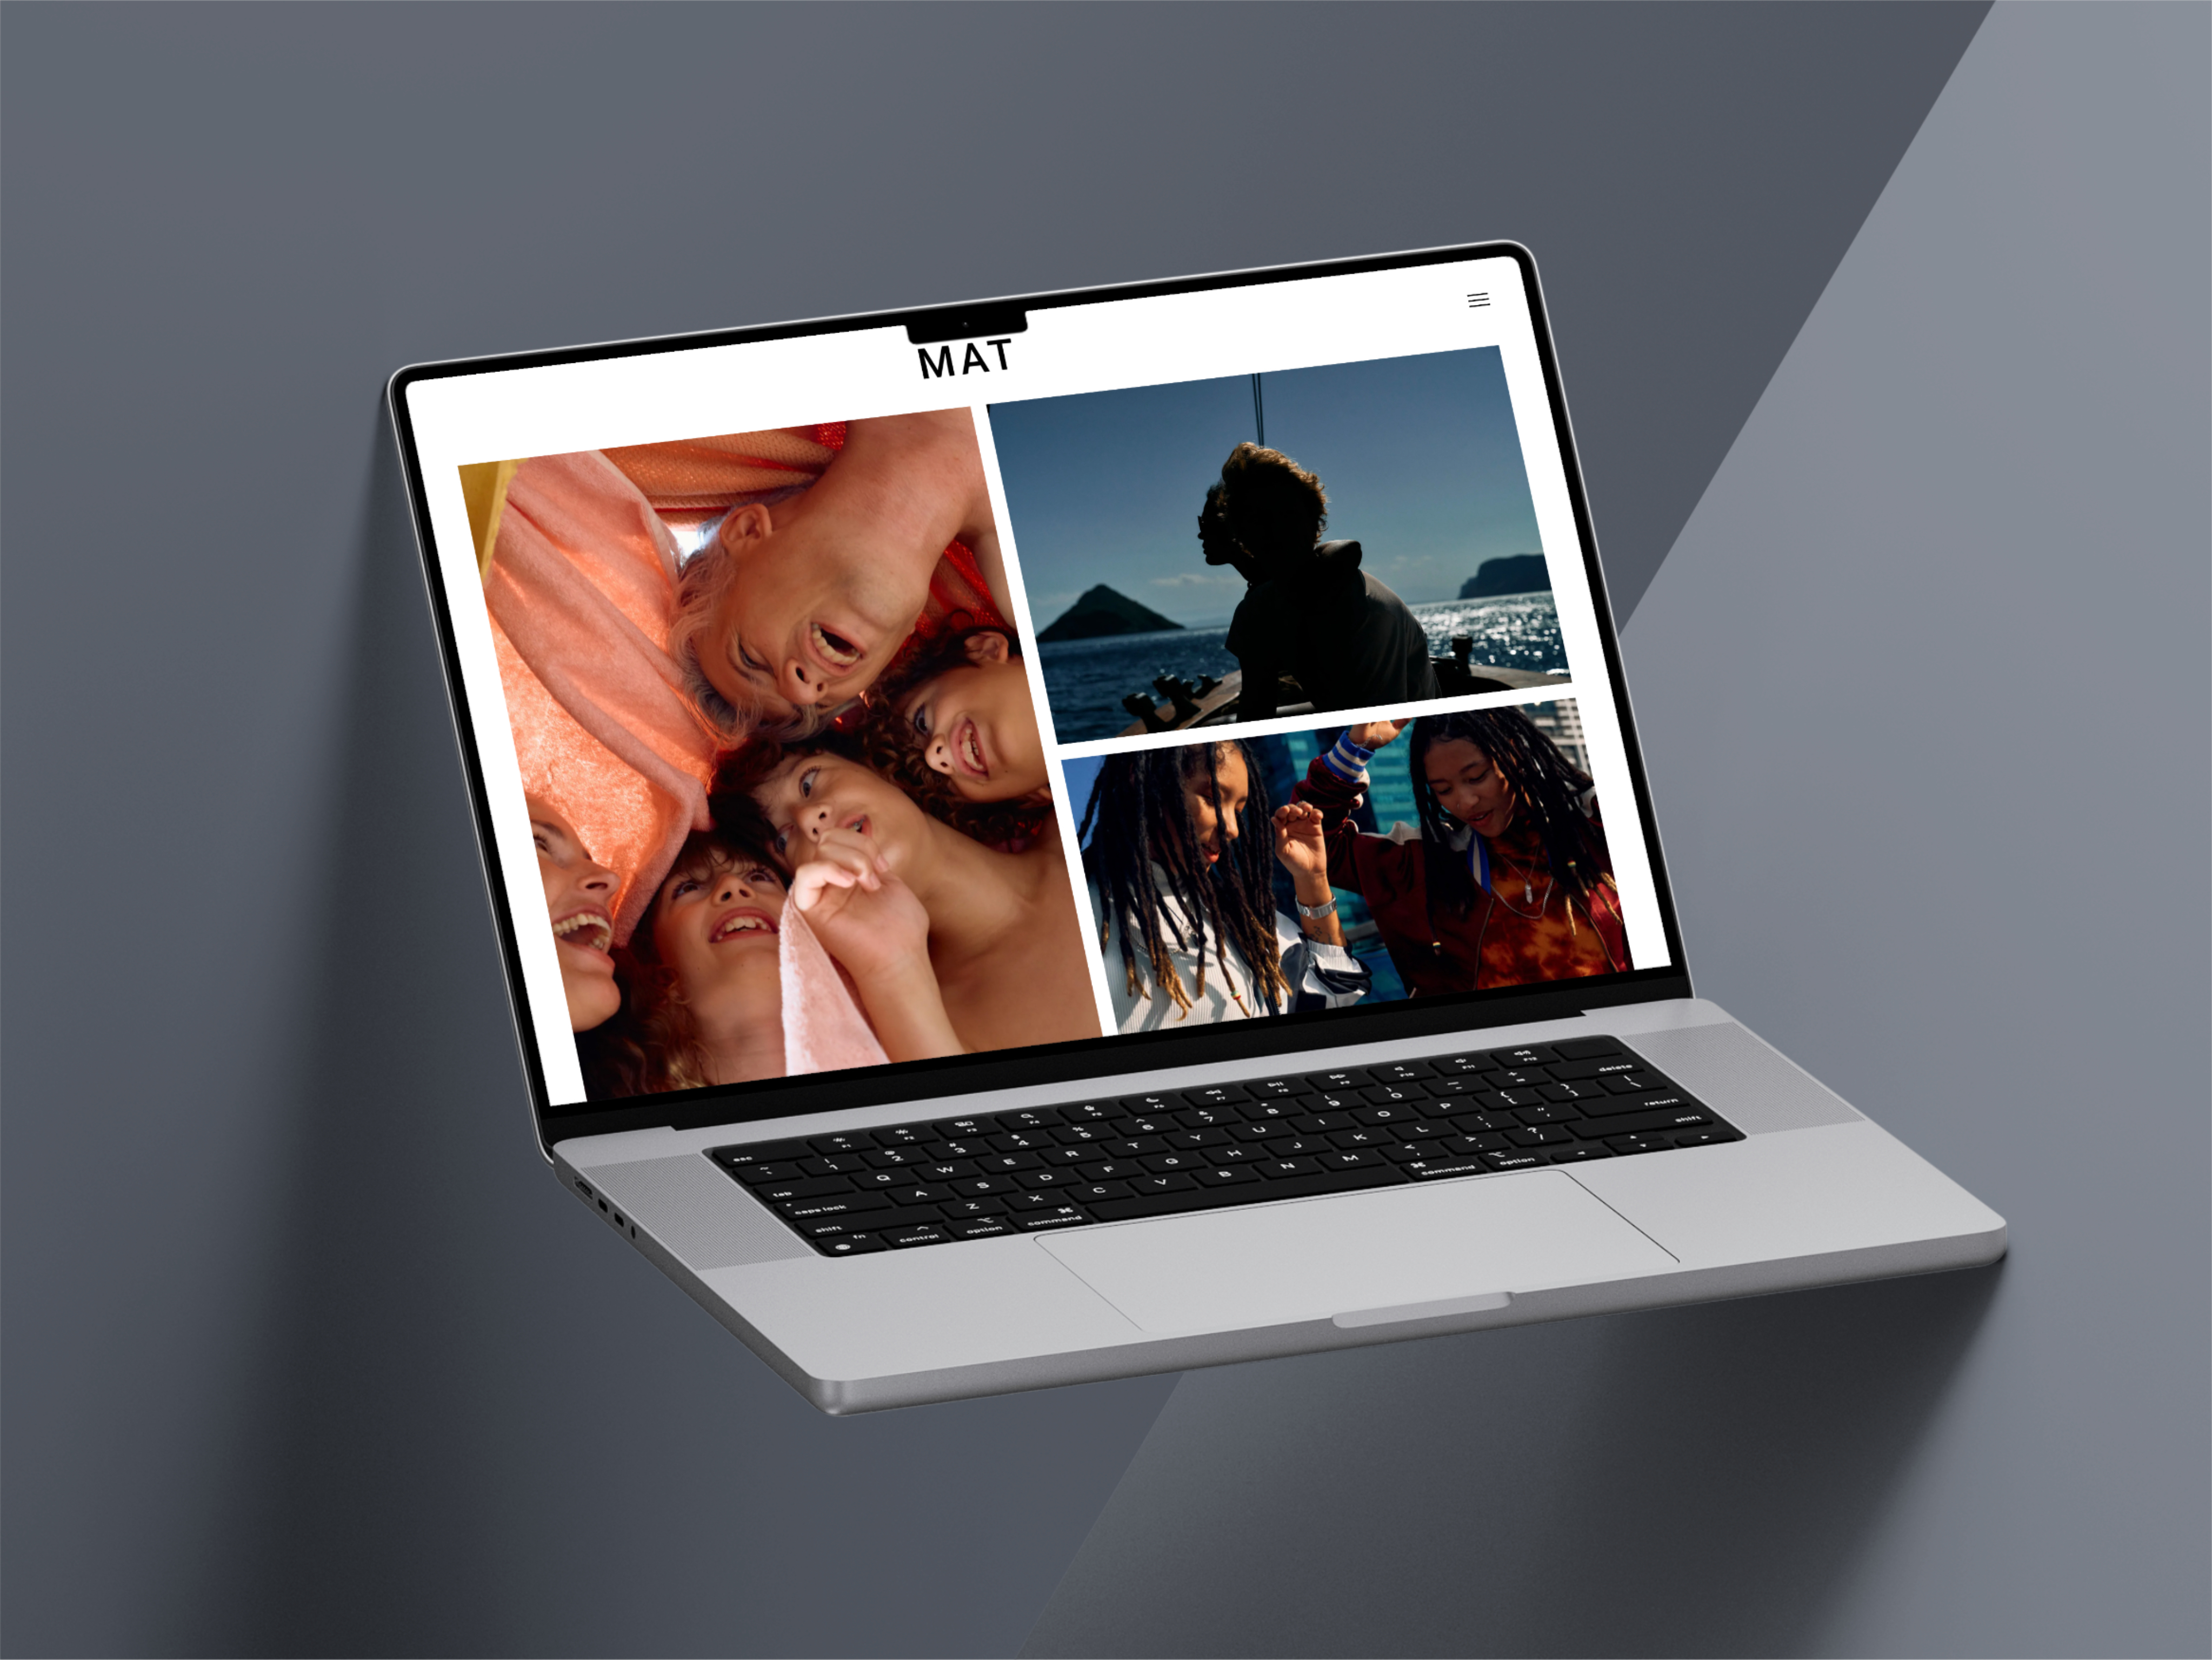
4. Vsble: Best All-Around Choice for Visual Creators​

Vsble is a platform designed specifically for visual creators. It offers a wide range of features that are perfect for photographers, designers, and artists who want to showcase their work.

Key Features:​

  • No-Code Portfolio Creation: Build stunning portfolio websites through an intuitive drag-and-drop interface
  • Advanced Privacy Protection: Built-in GDPR compliance with integrated cookie solutions safeguards user data
  • Seamless Client Collaboration: Professional file-sharing capabilities streamline project delivery and feedback
  • Copyright Protection: Exclusive Copytrack integration automatically detects unauthorized image use and handles legal enforcement
  • Monetization Options: Direct payment processing for image rights violations through Copytrack's automated system

Professional Tools:​

  • Customizable V2.0 templates optimized for visual content
  • SEO optimization tools to enhance portfolio visibility
  • Mobile-responsive designs that adapt to all screen sizes
  • PDF generation tools for professional client presentations
  • Integration capabilities with popular domain providers

Vsble stands out from other website builders because it focuses specifically on the needs of visual creators. It offers tools that address common challenges such as protecting images, managing clients, and delivering professional presentations - features that are often overlooked by general-purpose platforms.

Users can expect regular updates to the platform, which will include new customization options and template designs. The recent release of the Barcelona 2.0 template shows Vsble's dedication to staying up-to-date with modern design trends while still being easy to use.

In addition to these features, Vsble also offers backup and collaboration tools that allow users to store, share, and back up high-resolution photos, RAW files, 4K+ videos, and illustrations with ultra-fast, secure cloud storage. This makes managing active projects and delivering client-ready galleries a seamless experience.

Whether you're a photographer looking to create a stunning portfolio website, a designer wanting to showcase your work or an illustrator in need of a mobile-ready site that is SEO-boosted, Vsble has you covered. They even provide tailored solutions for cinematographers, offering free websites that allow filmmakers to display their films in HD and engage a global audience effortlessly.

5. Other Noteworthy Platforms Tailored to Specific Needs​

Each creative professional has unique requirements. These specialized platforms cater to specific visual creator needs:

1. Weblium​

2. WordPress​

3. Zenfolio​

  • Specialized video portfolio management
  • Client proofing and delivery systems
  • Integrated e-commerce for video sales
  • Smart automation tools for workflow optimization

4. Webflow​

These platforms serve distinct niches within the visual creation space. Weblium excels in quick video portfolio creation, WordPress offers unlimited customization potential, Zenfolio streamlines video business operations, and Webflow provides professional-grade design tools. The choice depends on your specific expertise, technical comfort level, and business requirements.

Comparing Pricing Plans and Scalability Options​

Each website builder offers distinct pricing structures tailored to different creator needs:

Entry-Level Plans:​

  • Squarespace: Starting at $16/month with annual billing
  • Wix: Basic plan from $14/month
  • Vsble: Professional plan at $12/month
  • Shopify: Basic package at $29/month

Free Options & Trials:​

  • Wix: Free plan with basic features
  • Vsble: 14-day full-feature trial
  • Shopify: 3-day trial period
  • Squarespace: 14-day test drive

Scalability Features:​

  • Storage upgrades for growing portfolios
  • Additional staff accounts
  • Advanced analytics tools
  • Enhanced security features
  • API access for custom integrations

The pricing sweet spot for most visual creators falls between $12-30 monthly, depending on specific needs. Premium features like unlimited storage, custom domains, and advanced e-commerce capabilities typically require higher-tier plans. Many platforms offer annual billing discounts ranging from 20-30% off monthly rates.

Consider future growth requirements when selecting a plan - upgrading later is seamless but downgrading might result in feature loss. Storage limits, bandwidth restrictions, and transaction fees play crucial roles in long-term cost calculations.

Essential Marketing & SEO Tools Included in Top Builders​

SEO tools built into these platforms can turn your visual portfolio into a powerful tool for attracting clients. Each platform has its own set of features for optimizing your website:

  • Squarespace: Automated XML sitemaps, customizable meta descriptions, and alt text for images
  • Wix: SEO Wiz tool that provides step-by-step guidance for optimization
  • Vsble: Integrated SEO tools with automatic image optimization
  • Shopify: Product-specific SEO fields and rich snippets

Integration with social media platforms can help you reach a wider audience:

These platforms also offer email marketing features to help you build and maintain relationships with your clients:

  • Squarespace Email Campaigns: Built-in tools for creating newsletters with visually appealing templates
  • Wix Email Marketing: Automated email campaigns with tracking capabilities to measure engagement
  • Vsble: Tools for communicating with clients that comply with GDPR regulations through forms
  • Shopify: Ability to segment customers and create automated sequences of emails

To improve your marketing strategy and grow your visual business, it's important to analyze data on how visitors interact with your website. These platforms provide analytics dashboards where you can track metrics such as visitor behavior, engagement levels, and conversion rates.

Mobile Responsiveness and Visitor Engagement Features​

A mobile-responsive portfolio website adapts instantly to any screen size, maintaining visual impact across devices. In 2025, 75% of website traffic comes from mobile devices, making responsive design essential for visual creators.

Features Offered by Modern Website Builders​

Modern website builders offer:

  • Smart Layout Adjustments: Images and galleries automatically resize without losing quality
  • Touch-Friendly Navigation: Intuitive menus and swipe gestures for mobile users
  • Fast Loading Times: Optimized image compression for quick mobile loading
  • Interactive Elements: Mobile-ready contact forms, booking systems, and chat widgets

Visitor Engagement Tools​

Visitor engagement tools create direct communication channels:

  • Live chat widgets for real-time client conversations
  • Custom contact forms with file upload capabilities
  • Automated booking systems for photography sessions
  • Client galleries with password protection
  • Social proof elements like testimonials and reviews

These features transform static portfolios into dynamic platforms that capture leads and convert visitors into clients. The best website builders integrate these engagement tools seamlessly into their mobile-responsive templates, eliminating the need for third-party solutions.

Making Your Choice: Best Website Builder for Visual Creators in 2025​

The perfect website builder empowers you to showcase your creative work while protecting your digital assets. Vsble stands out as a comprehensive solution, offering an unmatched combination of user-friendly design tools, built-in GDPR compliance, and integrated copyright protection through Copytrack.

Your choice depends on your specific needs:

  • For E-commerce Focus: Shopify delivers robust selling features
  • For Design Freedom: Squarespace provides elegant templates
  • For Marketing Tools: Wix offers extensive promotional features
  • For Complete Protection: Vsble safeguards your creative work

Consider these key factors when selecting your platform:

  • Budget and pricing plans
  • Technical skill requirements
  • Growth potential
  • Client collaboration needs
  • Copyright protection requirements

Start your journey by testing different platforms through free trials. The right website builder will serve as a powerful foundation for your creative business, helping you reach new audiences and protect your work in the digital landscape of 2025.

FAQs (Frequently Asked Questions)​

Why is having a visually appealing portfolio website important for creators in 2025?​

A visually appealing portfolio website is crucial for creators in 2025 as it showcases their work professionally, attracts potential clients or fans, and enhances their online presence. It serves as a dynamic platform to display creative projects, build credibility, and engage a wider audience through mobile-friendly designs and SEO optimization.

What key features should visual creators look for in the best website builder?​

Visual creators should look for website builders that offer stylish templates and extensive customization options, ease of use with drag-and-drop editors, SEO tools for better online visibility, mobile responsiveness to reach a broader audience, and built-in e-commerce capabilities to sell artwork or services directly from their site.

Which website builders are considered the top choices for visual creators in 2025?​

The top website builders for visual creators in 2025 include Squarespace, known for elegant design and commerce integration; Wix, offering extensive customization and marketing power; Shopify, ideal for advanced e-commerce needs; Vsble, an all-around choice with GDPR compliance and copyright protection; and other noteworthy platforms like Weblium, WordPress, Zenfolio, and Webflow tailored to specific creative needs.

How does Squarespace cater specifically to artists and designers?​

Squarespace offers award-winning creative templates tailored specifically for artists and designers, dynamic content blocks providing creative freedom, built-in online stores to sell digital and physical art, and marketing integrations such as social media feeds and newsletters. This makes it an elegant solution combining design sophistication with commerce integration.

What makes Vsble stand out as the best all-around website builder for visual creators?​

Vsble stands out due to its unique features designed specifically for visual creators including easy creation of stunning portfolio websites without coding, GDPR-compliant integrated cookie solutions ensuring privacy standards, file-sharing capabilities supporting client collaboration, and Copytrack integration that protects image copyrights while enabling payouts. This combination addresses both creative presentation and legal protection needs.

How do top website builders support marketing and SEO efforts for visual creators?​

Top website builders incorporate essential SEO optimization tools that help visual creators attract clients organically through improved search engine rankings. They also integrate seamlessly with social media platforms to enhance visibility and engagement. Additionally, many include email marketing features such as newsletters (e.g., Squarespace and Wix) enabling creators to maintain direct communication with their audience.

What Makes A Great Portfolio Website?

· 8 min read
Natalia Vinogradova
Senior Blog Editor AT Vsble

Online Portfolio

The Key Elements of Portfolio Design​

  1. Quality over Quantity: Choose your best work to showcase.

  2. High-Resolution Images: Ensure your work is displayed in the best quality.

  3. Clear Navigation: Make it easy for visitors to find what they are looking for.

  4. Contact Information: Make it easy for potential clients to get in touch.

Vsble - The Best Portfolio Website Builder for Creatives

When it comes to building personal portfolio websites, www.vsble.me stands out as an excellent choice. This portfolio website builder is perfect for photographers and graphic designers alike. With a plethora of website templates to choose from, it offers the versatility to suit any style. Vsble offers stunning, SEO-optimized portfolio websites that can be set up in seconds without any coding skills. It allows for easy template selection, content uploading, and design customization. The unique web design choices make your portfolio stand out. Vsble integrates seamlessly with various services including chat, calendar, marketing, blog, and CRM applications. It also includes e-commerce and marketing tools, allowing users to sell products, services, and more. SSL security, GDPR compliance, and advanced SEO tools are included, and users can connect a custom domain from any provider with their Vsble website. Users have praised Vsble for its design flexibility, customization, excellent customer support, and ease of use.

portfolio website picture

Portfolio Website by Johannes Brauner

Adobe Portfolio - A Perfect Choice for Designers

Adobe Portfolio is another excellent choice for building your portfolio website. If you are a graphic designer, this platform is perfect. Adobe Portfolio integrates seamlessly with Adobe Fonts and Adobe Lightroom, making it easy to create a professional website with top-notch typography and high-quality images. Furthermore, the templates are versatile, which is perfect for showcasing a design portfolio.

Squarespace - One of the Leading Tools

Squarespace excels in offering stylish web design templates, ideal for creatives aiming to impress potential clients. Its templates are responsive, ensuring a seamless experience across devices. The drag-and-drop editor enables easy customization, while robust SEO tools optimize your site for search engines. With seamless social media integration, Squarespace stands as a top choice for a professional, visually captivating portfolio that reaches a wide audience.

WIX - A Builder with Focus on Small Business.

Wix is a versatile portfolio builder known for its flexibility in website design, making it an excellent platform for creating an online portfolio. With a plethora of templates, Wix enables you to craft a design portfolio that reflects your style and appeals to potential clients.

The platform's drag-and-drop editor ensures that even those without coding knowledge can easily create a stunning online portfolio. Additionally, Wix’s SEO tools help in boosting your site's visibility, connecting you with a broader audience of potential clients.

In summary, Wix combines ease of use with a wealth of website design options, making it a prime choice for building a striking design portfolio that not only showcases your work but also effectively engages potential clients.

A caption of portfolio website of photographer Gavin Bond

Portfolio website of photographer Gavin Bond

Weebly - Elevate Your Creative Presence

Weebly is a user-friendly website builder that empowers creatives to establish a professional online presence. With its intuitive drag-and-drop editor, Weebly makes it easy for users to build a visually appealing website without any coding knowledge. The platform offers a range of stylish templates, which are customizable to reflect your brand’s identity. Weebly’s integrated SEO tools and e-commerce capabilities are added perks, ensuring your site ranks well on search engines and allows for seamless transactions. Whether you are a photographer, designer, or artist, Weebly is an excellent choice for showcasing your work and connecting with a wider audience.

Cargo - Showcase Your Artistry

Cargo is a niche website builder tailored for artists and designers seeking to create a standout online portfolio. With an emphasis on design aesthetics, Cargo provides an array of beautifully curated templates that bring your work to the forefront. Its simple interface and drag-and-drop editor make it easy to construct a bespoke portfolio that reflects your artistic vision.

Cargo’s templates are not only visually captivating but also responsive, ensuring your portfolio is accessible and impressive on all devices. The platform also offers custom domain names and built-in SEO tools, bolstering your professional image and improving search engine visibility.

Ideal for creatives focusing on design, Cargo enables artists and designers to effortlessly build a refined online presence that truly embodies their work.

GoDaddy Website Builder: Simple but Standard

GoDaddy, primarily known as a giant in domain registration. While its domain services are renowned, the website builder is geared towards simplicity and ease. With a user-friendly interface and basic templates, it’s a quick solution for those needing a no-fuss online presence.

However, GoDaddy's website builder falls short in design and functionality. The templates are standard and lack customization options, making it less appealing for those seeking a unique aesthetic. Additionally, the functionalities are basic, limiting advanced features.

In summary, GoDaddy Website Builder is a convenient choice for a simple website, but those seeking more creative control and advanced features may want to explore other options.

Why WordPress Themes are Worth Considering

WordPress is well-known for its versatility and the availability of countless templates. Choosing a WordPress theme for your portfolio website can be a wise decision. It is particularly useful for photographers as it offers numerous photography portfolio templates.

Importance of Social Media Integration

Social media integration is a crucial aspect of any portfolio website design. By linking your portfolio website to your social media, you can easily share your work with a wider audience. This increases your exposure and opens up opportunities for gaining more prospective clients.

Building a Portfolio Website for Graphic Design Studio

If you are an art director at a graphic design studio, creating a portfolio site is imperative. A portfolio website is not just for freelancers; it's a powerful tool for design studios too. By showcasing the studio’s work, you draw in future clients and set an example for aspiring designers seeking inspiration.

Customizing Templates for UI and UX Designers

UI designers and UX designers need to pay special attention to user experience. When choosing a website template, make sure it represents the design principles you stand for. A UI designer’s portfolio should have a clean layout, while a UX designer should focus on the ease of navigation.

How to Attract Potential Clients and Customers

Your portfolio website is your gateway to attracting potential clients. Make sure to include client testimonials, a professional biography, and clearly display your contact information. This ensures that when a visitor or potential customer is impressed with your work, they can easily reach out.

A Free Portfolio Website – A Viable Option?

There are options for building a free portfolio website. However, investing in a premium portfolio builder is often more beneficial in the long run. It provides more customization options and a more professional appearance.

Related Topics for Added Value

Adding a blog or a page dedicated to related topics can enhance your portfolio website. This not only provides value to your visitors but also establishes you as an authority in yourfield.

The Role of Photography in Portfolio Websites

Photographers need to pay special attention to the layout and design of their portfolio websites. High-quality images are a must, and the website design should complement the photography portfolio. This helps in making a lasting impression on potential clients and art directors.

Elevate Your Graphic Design Portfolio with a Website

A well-designed website adds credibility and professionalism. It acts as a digital storefront, where a potential client can easily explore your work, learn about your services, and contact you. Moreover, with proper Search Engine Optimization, your website can rank higher in search results, enhancing visibility.

Social media, while beneficial for networking, can be limiting. The unpredictable algorithms can reduce your content's reach, and the cluttered environment may cause your graphic design portfolio to go unnoticed.

In summary, a website is indispensable for professionals seeking to showcase their portfolio effectively and attract potential clients. It establishes a solid foundation for your online presence and is a valuable investment for long-term success.

The Importance of Typography in Portfolio Design

Typography is a crucial element in portfolio design, especially for graphic designers. Selecting the right fonts and ensuring readability can make a significant difference in conveying your style and professionalism in your web design.

Conclusion: Building Your Ultimate Portfolio Website

In conclusion, building a portfolio website is an essential step for any creative professional. It is your digital business card, showcasing your work to prospective clients, future clients, and the wider world. Whether you are a graphic designer, photographer, or UX designer, choosing the right portfolio website builder, such as www.vsble.me or Adobe Portfolio, and customizing the design to reflect your unique style is crucial.

Remember that your portfolio is more than just a collection of your work; it's a reflection of who you are as a designer. It should be a source of inspiration to others and a tool for attracting potential clients. Investing time and effort in your portfolio design will pay off in the long run, as a well-designed portfolio site is key to building a successful career as a creative professional.

So, unleash your creativity, pick the best website template, integrate your social media, and start building your dream portfolio website today!

What Is a Favicon & Everything You Need to Know About Favicons

· 6 min read
Natalia Vinogradova
Senior Blog Editor AT Vsble

Online Portfolio

Did you know that one of the most effective parts of your branding is one you take for granted every day? It's not your logo, and it’s not your meticulously crafted color scheme or your blog design. It’s the tiny picture associated with each of your website's URLs! That’s right - it’s your favicon!

A favicon (or "favorites icon") is that tiny image that shows up in browser tabs to help readers identify individual sites. If you've used a web browser before, then it's almost sure that you have seen a favicon before.

Wondering if you need to have your own favicon? Read on to learn more about favicons and how you can build and implement one today!‍

What is a Favicon?​

A favicon, also known as a shortcut, website, URL, or bookmark icon, is a small image associated with a particular web page.

Favicons allow users to identify your website by quickly recognizing its design, color scheme, and logos. They are meant to represent your site’s content at a glance and can be easily seen on bookmarks, favorites lists, and the tabs in web browsers.

Why is My Favicon Important?​

Your website's favicon is important because it reinforces brand recognition. Users are able to quickly identify your site by remembering its look and feel. The color scheme of the favicon will instantly remind them of your site's design, and the logo in the center of the image will remind them of your organization.

Where Do Favicons Appear Online?​

A favicon will appear on your website's address bar or tab for visitors who are browsing with a browser that supports them. Favicon also pop up in the Internet browser history list and bookmark section of most web browsers like Google Chrome, Firefox, Safari, etc.

As mobile search continues to grow, we can expect to see more and more searches being performed on smartphones and tablets. As a result, it's important that your site has a favicon to catch mobile users’ attention when they're searching from the go.

What Are the Benefits of Having a Favicon?​

Though they may be small, favicons are mighty. Businesses that create and implement their favicons across their platforms are leveraging several key benefits.

Here's how favicons help your site stand out:

Improves Brand Recognition​

If your site's users can quickly identify your website by remembering its look and feel, it will increase their chances of returning. In addition, if other people see your site's favicon in an email or on another webpage and remember it, they'll be more likely to visit your site as well.

Strengthens Brand Credibility​

Consistency is key to a strong brand, and your website's favicon reinforces this fact by ensuring that your site's look and feel are consistent across all platforms. Suppose one person sees a design at a conference and another sees the same design on your company's webpage. In that case, they'll be more likely to recognize you as a legitimate business because of the shared design elements.

Promotes Website Usage​

Having a favicon will encourage users to bookmark and favorite your site because the icon will always appear in that user's list of bookmarks or favorites. The favicon will continually remind that person of your site's existence and entice him or her to visit again.

Attracts New Users​

A favicon is another way for your website to stand out from the crowd and attract visitors who want to know what you're all about. A good, well-designed icon will draw attention and intrigue those who come across it.

Help Visitors Move Through Your Site Effectively​

Not only do favicons help visitors locate your site, they also make it easier for them to move through your site. Since the user will see your icon on every page, he or she will be able to easily navigate between pages without any hiccups.

Does a Favicon Improve My SEO?

Yes! Favicons are an important part of your site's overall SEO strategy because they impact all of the following elements:

1.URL Optimization: Your favicon will appear in your website's URL. It can be used to optimize anchor text for search engine optimization (SEO).

2. Traffic to Your Website: Your favicon is yet another way to attract visitors and increase your website's traffic.

3. Trust Signals: When a user sees a favicon, he or she will feel more comfortable with the site because it reinforces the company's brand and image. Trust signals are a key aspect of bringing search engine rankings up to an optimal level.

What Should I Include in My Favicon's Design?

There are a few things that your favicon must have to be considered a success, including:

Appropriate Functionality: Your favicon should work effectively across all platforms and devices. Since users can see your site's favicon in their favorite websites list or bookmarks bar, make sure it is displayed correctly everywhere. An effective favicon is one that users instantly recognize and can easily navigate with.

Logo: The logo in your favicon should be recognizable to both users and search engines, which will improve your site's brand visibility.

Modern Elements: Favicons are typically depicted using an image or a short animation. Make sure that yours uses modern elements like flat design, bright colors, and simple shapes.

Readable Text: Your favicon should include readable text that spells your business's name clearly and effectively.

Resolution Relevance: Favicons should be displayed in several different sizes, so make sure yours is optimized for all platforms and browsers.

How Do I Design a Favicon?

Are you ready to build your own favicon for use with your branding? Here are a few guidelines that will help you produce an effective design:

Choose an Appropriate Favicon Size​

Favicons should be between 19 x 19 pixels and 128 x 128 pixels. They should also have a transparent background because favicons are usually displayed on top of other images or designs.

Be Careful with Animation​

While it is acceptable to include animation in your favicon, make sure that it is minimal and doesn't distract users. If you do decide to include animation, make sure the movement fits with the overall design of the icon.

Choose a Font​

You'll need to choose an appropriate font for your site's name or brand name. Be creative! Use a unique font to produce a distinctive design. Fonts can be easily changed using CSS.

Consider the Colors​

Remember that your website's colors will appear in your favicon, so choose them carefully. You should also consider other websites that feature similar color schemes, brands, or styles. If you design your icon to stand out among its rivals, it might not work well with theirs!

Test Your Favicon​

It is important to test your favicon before you publish it. To do so, just use a few different platforms including mobile devices and browsers. Also, check that your favicon works well with text and other graphics on your site.

How to Optimize Images For The Web

· 4 min read
Natalia Vinogradova
Senior Blog Editor AT Vsble

Online Portfolio

Optimizing the images you upload on your website can have a huge impact on their overall user experience. This is especially important for the speed of your website. If the images aren’t optimized properly, the speed of your website might suffer, which makes it difficult for a visitor to navigate your website.

Why It is Important to Optimize Images​

Let’s say you have a portfolio website and want the images to make your work stand out to the people who visit your website. More often than not, uploading images without optimizing them for the web can lead to a loss of the quality of your pictures. This would render your portfolio useless because of the poor quality.

For beginners, not optimizing the images is a rookie mistake. You should know that images consume a lot of data. If you don’t optimize the images, there’s a high chance that they will make your website slower. However, you can fix that by optimizing your images for the web.

It’s important to do this in a way that doesn’t compromise the quality of your pictures while also maintaining a fast user experience. If the file size of your image is small, then the speed of your website will be fast, ensuring a good user experience. That’s why it’s important to optimize images for the web. Furthermore, image optimization can help boost SEO rankings and increase the conversion rate for sales and leads. Additionally, it also decreases the maintenance cost of your website and uses less storage.

How to Optimize Images For The Web​

Optimizing images is the process of decreasing the size of your image files so they don’t make your website slower. Decreasing the file size of your images is usually done with the help of a plugin or by running a script. This helps improve the load speed of your portfolio website.

You have to consider several factors while optimizing images for your website. The first one is the image format. It’s important to choose the best image format to upload to your website. You can use three different types of file format for images:

â—Ź PNG - This format is known to produce high-quality images, which is why pictures in this format have a large file size.

â—Ź JPEG - This format can be adjusted to decrease the size without compromising on the quality.

● GIF - This format makes use of only 256 colors. It’s great for animated images.

Quality Vs. Size​

Image optimization is performed by compressing technologies like “Lossy” and “Lossless”, which help reduce the overall file size of your images. But which one of these will maintain the quality and reduce the size? Let’s have a look.

Lossy is a filter that removes some of the data, which in turn deteriorates the quality of your image. While using this filter, you have to be mindful of how much you reduce the image. Make sure that you use an adequate tool like Adobe Photoshop or Affinity Photo to decrease the size of the image.

The trick is to use a medium compression rate so that the quality of your image remains intact while reducing the size. If you use a high compression rate, it will drastically reduce the quality of your image.

Lossless is a filter that cuts down on the data. Remember that first the images will be uncompressed so they can be rendered for the web. You can use desktop optimization tools like Photoshop, FileOptimizer, and ImageOptim to perform a lossless compression of your images to get them ready for the web.

Compressing the Images​

When it comes to compressing the images for your website, there are several optimization tools you can use. While a lot of optimization tools offer premium features for a fee, some of them are free. Some of the most efficient tools you can use to optimize your images for the web are:

â—Ź Affinity Photo

â—Ź Adobe Photoshop

â—Ź Gimp

â—Ź Paint.NET

â—Ź GIFsicle

â—Ź JPEGtran

â—Ź JPEG Mini

â—Ź OptiPNG

â—Ź Pngquant

â—Ź FileOptimizer

â—Ź ImageOptim

â—Ź Trimage

â—Ź ImageResize.org

Why An SSL Certificate is Important for Client Trust and Google Rankings

· 3 min read
Natalia Vinogradova
Senior Blog Editor AT Vsble

Online Portfolio

If you have a website, you’ve probably found yourself wondering how you can find your way to the top of Google rankings. There are several answers to this question, ranging from a difference of philosophy to purely data-driven factors. Today, we are going to look at one of these answers - SSL.

What Is SSL?​

SSL (Secure Sockets Layer) certificates provide an extra layer of security to your website online. They are used to protect sensitive user data from being prone to data and security breaches. These certificates are essential for HTTPS websites that ask their users for confidential information like credit card information, bank OTPs, etc.

SSL certificates are small files uploaded to a web server to ensure a secure connection between the web server and a browser. The purpose of SSL certificates is to make your website a relatively secure place for interactions with your users. Even though SSL certificates are free, a lot of websites don’t use them.

Why are SSL Certificates Important?​

One of the best parts of securing your website with an SSL certificate is that it will boost your Google rankings. This is because SSL certificates imply that your website is more secure and safe for Google’s users. Getting an SSL certificate would boost your website’s performance because of Google’s algorithm.

SSL certificates are like a free website builder, especially if you have an HTTPS website. Google’s algorithm scours the web for reliable and secure HTTPS websites that are safe from hackers. If your website has an SSL certificate, it is more likely to become part of Google’s top SEO rankings.

iphone disaply showing a SSL lock

SSL Certificate Establishes Trust

SSL certificates mark your website with a seal of security that makes Google trust your website enough to rank it on the top. They show that the website is verified and less prone to hack attacks while improving your SEO rankings.

Another significant reason to make sure that your website has an SSL certificate is client trust. As we mentioned earlier, SSL certificates act as a padlock of security that tries to secure a safe connection between your web server and the browser used to access your website. This means that if your website has an SSL certificate, the information shared between the web server and the browser is secure.

This would establish more confidence with your clients. An SSL certificate will add a seal of trust and security to your website, which can help you land more business connections. Furthermore, it helps your clients trust you with important information that may not be safe on a website that is vulnerable to hackers.

As we mentioned earlier, SSL certificates are free. Vsble is a great platform to start your website with a free SSL certificate. This platform offers this free SSL certificate to every new free user account. Furthermore, if you create a pro account with Vsble, you can connect a custom domain. Every pro account user gets the opportunity to snag a free SSL certificate for their website.

Get on Vsble today and claim your free SSL certificate. Not only will it garner your clients’ trust, but it will also improve your Google rankings.

How to Quickly Delete Your Browser Cache

· 5 min read
Natalia Vinogradova
Senior Blog Editor AT Vsble

Online Portfolio

Want to know how to empty your browser cache quickly? Not even sure what a browser cache is? Read on to learn more and find out how you can boost your browsing speed with a few simple steps!

Want to know how to empty your browser cache quickly? Not even sure what a browser cache is? Read on to learn more and find out how you can boost your browsing speed with a few simple steps!

What is a Browser Cache?​

It's best to think of your browser cache as a temporary storage area for web pages and images. The goal of a browser cache is to help save time when browsing the internet. Every website you visit will have some information saved in your browser cache, and your browser can access that data to populate a commonly-visited website faster quickly.

The browser cache is most commonly used to store images, scripts, and web pages. It also stores how the website responded when you click on an image or link, including what was displayed on your screen (text size, background color), how long it took for a particular page to load, and more.

The information in your browser cache can be used by service providers such as Google, Yahoo!, and Microsoft Bing to produce search engine results relevant to you. Website search engines know how often you've clicked on certain links before with similar parameters, and your browser cache and website cookies feed this information to them regularly.

‍

Is My Browser Cache the Same As "Cookies?"

Your browser cache and "cookies" are not quite the same but offer similar functionality. Sometimes, you may wish to delete your browser cache and any stored cookies simultaneously.

Website cookies are small pieces of data that sometimes contain information about your computer and browsing habits to help identify you in the future. Website cookies typically store anonymous data.

‍

Why You Should Clear Your Browser Cache

The browser cache is good for helping boost your browsing power, but sometimes it becomes full. When this happens, the browser can't store any more information, and you may experience a slowdown in your internet connection or web pages loading slowly.

When you clear out these temporary data files from your browser cache, you'll free up some space so that website content will load faster for future browsing sessions. Let's take a look at how to clear your browser cache on common browsers:

How to Clear Your Browser Cache on Google Chrome

To clear your Google Chrome browser cache, follow these steps:

  1. Navigate to the Tools menu (click on the three dotted lines in the browser’s upper-right corner).

  2. Click History.

  3. Click Clear Browsing Data on the left-hand side.

  4. Click Time Range and set it to All Time.

  5. Select Cookies and other site data as well as Cached images and files and click Clear Data.

  6. Are you using a Windows PC? Close and re-open Chrome to save the settings. On an Apple computer, navigate to the Chrome menu located at the top menu bar, and then select Quit to save your changes.

How to Clear Your Browser Cache on Firefox

To clear your Firefox browser cache, follow these steps:

  1. Click on the Tools option in your toolbar.

  2. Select Options (Or on a Mac, select Preferences).

  3. A menu to the left will open. Click on Privacy & Security.

  4. Navigate to the Cookies and Site Data button and click the "Clear Data..." option.

  5. Click the available two options and select “Clear Now”

  6. On a Windows PC, simply close and re-open the Firefox browser to save your changes. On an Apple computer, click the Firefox menu located in the menu bar and click Quit to save changes.

How to Clear Your Browser Cache on Safari

To clear your Safari browser cache, follow these steps:

  1. Click on Safari on the top menu bar.

  2. Select the Preferences option.

  3. Hover over and click the Privacy tab.

  4. Select Manage Website Data...

  5. Select Remove All and then click Remove Now.

  6. Click on the Safari menu on the top menu bar, and click Quit to close Safari. This will automatically save your changes.

How to Clear Your Browser Cache on Internet Explorer (IE)​

To clear your IE browser cache, follow these steps:

  1. Navigate to the Settings menu which is found in the upper-right corner.

  2. Select Internet Options from the drop-down list.

  3. Hover over the General tab located at the upper-left-hand side, and then scroll down to the option labeled “Browsing history.”

  4. Click the option called Delete...

  5. Select Temporary Internet files and website files, the Cookies and website data, History, and then the Download History boxes on the window.

  6. Click Delete to delete the cache.

  7. Fully close the Internet Explorer browser and then restart the browser to active the browser cache changes.

Follow Instructions Carefully to Avoid Deleting Data

Anytime you operate within your browser's settings to try and delete data, there is always a risk that you may inadvertently delete files or data that you don't want to lose. To avoid unnecessary risk, make sure to follow the process carefully and read all pop-ups or instructions that you see on the screen.

How to reply to inquiries and create quotes & estimates as photographer?

· 7 min read
Natalia Vinogradova
Senior Blog Editor AT Vsble

Online Portfolio

Here are some tips for creating a professional estimate as a photographer:​

  1. Determine your rates: The first step in creating a professional estimate is to determine your rates. This will depend on factors such as your level of experience, the type of photography you specialize in, and the demand for your services. Consider researching industry standards and talking to other photographers to get a sense of what is fair and competitive.

  2. Consider your costs: In addition to determining your hourly or project rate, you'll also need to consider your costs. This includes expenses such as equipment rental, travel expenses, and any additional services you may be offering (such as editing or retouching). Be sure to factor these costs into your estimate to ensure you're charging enough to cover your expenses and make a profit.

  3. Be transparent: It's important to be transparent and upfront about your rates and costs in your estimate. This will help build trust with your clients and ensure that there are no surprises later on. Be sure to clearly outline what is included in your estimate and any additional fees that may apply.

  4. Use a template: Creating estimates can be time-consuming, so it can be helpful to use a template. This will help ensure that you include all necessary information and that your estimate is organized and professional. There are many templates available online, or you can create your own using a spreadsheet or document software.

  5. Follow up: Once you've created your estimate, be sure to follow up with your client. This could be via email or phone, depending on their preference. Be sure to include any additional information they may have requested and answer any questions they may have.

If you're looking for additional resources on finding the right fees for your work, there are many online communities and forums for photographers where you can ask for advice and get feedback on your rates. Additionally, organizations like the Professional Photographers of America offer resources and tools for photographers looking to set their fees.

‍

Once you receive a request for an estimate or quote from a potential client, here are the top five steps you can take to process it:​

  1. Gather all necessary information: Be sure to ask the client for any additional information you may need in order to provide an accurate estimate. This could include details about the scope of the project, the location, and any specific requirements or preferences.

  2. Review the request carefully: Take some time to review the request carefully and make sure you understand exactly what the client is looking for. This will help ensure that you're able to provide an accurate estimate and avoid any misunderstandings.

  3. Create a draft estimate: Using a template or spreadsheet, create a draft estimate that includes your rates, costs, and any additional fees. Be sure to include any additional information that the client has provided.

  4. Review and revise: Once you have a draft estimate, review it carefully to ensure it is accurate and complete. Make any necessary revisions and double-check all of the details.

  5. Send the estimate: Once you're satisfied with your estimate, send it to the client via email or snail mail, depending on their preference. Be sure to include any additional information or clarification they may have requested.‍

Here's an example of a reply you could send after receiving a request for an estimate:​

‍

Dear [Client],

Thank you for considering me for your photography needs. I'm excited to learn more about your project and see how I can help.

To provide you with an accurate cost estimate, I'll need a little more information about your project. Could you please provide me with the following details:

  • What type of photography do you require (e.g. portrait, event, product)?

  • When and where will the photoshoot take place?

  • How many hours or days will the photoshoot take?

  • Will you need any additional services such as editing or retouching?

Once I have this information, I'll be able to provide you with a detailed estimate of my fees and any associated costs.

I look forward to discussing your project in more detail. Please don't hesitate to contact me if you have any further questions. If you prefere, you can pick a free time-slot on my Calendly link to discuss the project over phone or quck Zoom meeting: [Calendly link]*

Best regards,

[Your name]

‍

*Calendly - a top notch calendar automation platform that easily intagrates in your Vsble website.

Top 5 tools for invoicing and estimates. ​

  1. FreshBooks - FreshBooks is a invoicing tool that offers a range of features for photographers, including the ability to create and send quotes. With FreshBooks, you can create customizable quotes with your own branding, track which quotes have been accepted or declined, and easily convert quotes into invoices. https://www.freshbooks.com/

  2. QuickBooks - QuickBooks is a popular invoicing tool that offers a range of features for photographers, including the ability to create and send quotes. With QuickBooks, you can create customizable quotes with your own branding, track which quotes have been accepted or declined, and easily convert quotes into invoices. https://quickbooks.intuit.com/

  3. Zoho Invoice - Zoho Invoice is a invoicing tool that offers a range of features for photographers, including the ability to create and send quotes. With Zoho Invoice, you can create customizable quotes with your own branding, track which quotes have been accepted or declined, and easily convert quotes into invoices. https://www.zoho.com/invoice/

  4. Invoice2go - Invoice2go is a invoicing tool that offers a range of features for photographers, including the ability to create and send quotes. With Invoice2go, you can create customizable quotes with your own branding, track which quotes have been accepted or declined, and easily convert quotes into invoices. https://www.invoice2go.com/

  5. Wave - Wave is a invoicing tool that offers a range of features for photographers, including the ability to create and send quotes. With Wave, you can create customizable quotes with your own branding, track which quotes have been accepted or declined, and easily convert quotes into invoices. https://www.waveapps.com/

‍

Create a professionall call sheet for for your upacoming photoshoot.​

And finally, as a photographer, it's important to have a professional call sheet ready for your clients. A call sheet is a document that outlines the details of a photoshoot, including the location, time, and roles of all involved parties. It's an essential tool for keeping everyone on the same page and ensuring that the photoshoot runs smoothly.

Having a professional call sheet can help you look organized and prepared, which can build trust with your clients. It can also help prevent misunderstandings and miscommunications, which can save time and hassle on the day of the photoshoot.

There are many tools available to help you create a professional call sheet. Some options include:

  1. StudioBinder - StudioBinder is a film and television production management platform that offers a range of tools for creating call sheets. With StudioBinder, you can easily create and send call sheets to your clients, track changes and updates, and collaborate with your team.

  2. Call Sheet Creator - Call Sheet Creator is a simple tool that allows you to create and customize call sheets for your photoshoots. It offers a range of templates and design options, and allows you to easily share your call sheets with your clients and team.

  3. Google Sheets - Google Sheets is a free spreadsheet tool that can be used to create a professional call sheet. Simply create a new sheet, add the necessary information (such as location, time, roles, etc.), and share it with your clients and team.

  4. Yamdu  - Yamdu allows easily create callsheets for video & photo productions. Yamdu puts all the essential information, like the weather and the nearest hospital, together for you and generates a call sheet in seconds.

  5. Celtx- Free call sheet template to downloads

Overall, having a professional call sheet is an important tool for any photographer. It can help you look organized and prepared, and ensure that your photoshoots run smoothly. There are many tools available to help you create a professional call sheet, so be sure to choose the one that works best for you.

Why It's Important to Add Age Verification to Sensitive Content on Your Website

· 4 min read
Natalia Vinogradova
Senior Blog Editor AT Vsble

Online Portfolio

In the digital age, access to information and content is often just a click away. While this has opened up a vast world of opportunities, it has also raised concerns about who can access certain types of content online. Age-sensitive content, be it explicit, violent, or even related to restricted products like alcohol or tobacco, requires specific gatekeeping to ensure that only appropriate audiences view it. In this post, we'll dive into the reasons why age verification is crucial for such content and introduce a tool called Efsight that seamlessly integrates with the Vsble website builder to achieve this.

The Importance of Age Verification for Sensitive Content​

1. Legal Implications Many jurisdictions have strict laws in place regarding age-restricted products and services. Not adhering to these laws by not verifying the age of your visitors can lead to significant fines, legal actions, or a tarnished business reputation.

2. Ethical Responsibility It's not just about laws; it's about doing what's right. We must protect our young web users from inappropriate content that they might not be emotionally or mentally equipped to process.

3. Brand Image and Trust Implementing age verification reinforces your brand's commitment to social responsibility. Customers are more likely to trust and respect companies that take these precautions.

4. Accurate Marketing Data Understanding the demographics of your audience allows for better-targeted marketing. Age verification can provide insights into the age distribution of your users.

5. User Experience While it might seem counterintuitive, an age verification system can actually enhance user experience. For instance, adult users won't have to encounter content warnings repeatedly once their age has been verified.

Introducing Efsight: A Solution for Age Verification​

Thankfully, ensuring age-appropriate access doesn't have to be a complicated process. Efsight offers a plugin that can be easily integrated into any website, including those built using the Vsble website builder. With Efsight, you're not just getting a standard age gate; you're getting a tool built with modern web standards and flexibility in mind.

How to Add Efsight’s Age Verification to Your Vsble Website​

Step-by-Step Tutorial​

1. Create an Efsight Account

Before you can use the plugin, you'll need to register on Efsight's platform. Visit their official website, sign up, and follow the on-screen prompts.

Eflsight expands the functionality of your website with many different widgets.

2. Access the Age Verification Plugin

Once registered and logged in, navigate to the plugins section and select the age verification tool.

This will lead you to a customization page where you can select a designs and tailor the plugin to suit your website's aesthetics and requirements.

3. Customize the Plugin

Decide on the age threshold (e.g., 18+, 21+), design elements like colors and fonts, add logo and specify any customized messages you'd like to display to the users. Remember to save your settings.

4. Integrate with Vsble

Efsight will provide a unique code snippet for your customized plugin. Copy this code. Next, log into your Vsble account and navigate to integrations section. Click on custom integrations and paste the code in the body code section of your website.

Click on the widget in the list on the left, and then on "Install".

Copy the integration code.

In your Vsble dashboard go to integrations.

Click on "Custom Integrations".

Paste the code in the page body section and click "save".

5. Test the Integration Before making any changes live, always preview your site to ensure the plugin operates as expected. This will allow you to rectify any issues before your audience encounters them.

Active page verification.

6. Go Live! Once satisfied with the integration, save your changes in Vsble and publish your site. The age verification will now appear to any new visitors, ensuring that only the appropriate audience can access age-sensitive content.

Conclusion​

As guardians of online content, webmasters and business owners have a responsibility to their audience. Age verification, especially for sensitive content, is an integral part of this responsibility. With tools like Efsight and platforms like Vsble, implementing these measures has never been easier. By taking these steps, not only do you protect younger users, but you also safeguard your brand's image and reputation. Embrace age verification – it's the ethical, legal, and smart thing to do for your online business.

Top 6 Widgets for Enhancing Your Vsble Website with Elfsight

· 3 min read
Natalia Vinogradova
Senior Blog Editor AT Vsble

Online Portfolio

Enhancing the functionality and user experience of your website can significantly boost user engagement and satisfaction. For users of the Vsble website builder, Elfsight provides a treasure trove of widgets that are not only easy to implement but also incredibly beneficial for various web functionalities. In this article, we'll delve into the top six Elfsight widgets you should consider adding to your Vsble website.

1. Elfsight Contact Form​

Elfsight contact form widget with various adjustable templates to choose from.

Advantages:

  • Boost Interaction: Provides a straightforward way for visitors to reach out, ask questions, or provide feedback.

  • Spam Protection: Elfsight's contact form is equipped with anti-spam measures, ensuring that you only receive genuine communications.

  • Customizable: Tailor the form to match your website's aesthetics, ensuring a seamless integration with your site's design.

2. Age Verification​

Different age verification templates are available with adjustable colors and logo.

Advantages:

  • Regulatory Compliance: Ensure your website adheres to age-related laws, especially if you're offering age-restricted products or content.

  • Protect Young Users: Safeguard younger users from content they might not be emotionally or mentally prepared to consume.

  • Brand Image: Demonstrates social responsibility, enhancing your brand's reputation and trustworthiness.

3. PDF Embed​

Embed your CV, price list or any other document easily. You have many options to style the widget.

Advantages:

  • Content Presentation: Instead of forcing users to download files, they can view PDFs directly on your website, ensuring the content is accessible and user-friendly.

  • Versatility: From menus to e-books to product guides, you can showcase a wide range of content using the PDF Embed widget.

  • Mobile Responsive: Elfsight ensures that your embedded PDFs are viewable and clear on both desktop and mobile devices.

4. Audio Player​

Select various player templates and customize further their appearance.

Advantages:

  • Engaging Content: Share podcasts, music, interviews, or any audio content seamlessly on your site.

  • Custom Playlists: Organize and present multiple audio tracks, giving users control over playback and sequence.

  • Stylish Design: The audio player is sleek and customizable, ensuring it complements your website's design while providing users with an intuitive interface.

5. Social Share Buttons​

Add multiple social account and customize icon style and positioning.

Advantages:

  • Boost Visibility: Make it simple for visitors to share your content on their social media platforms, amplifying your reach.

  • Integrated Analytics: Track shares and interactions, gaining insights into which content resonates most with your audience.

  • Tailored Appearance: Customize button designs, placements, and even the social platforms you want to prioritize.

6. Before-After Slider​

Easily demonstrate your retouching skills or project stages.

Advantages:

  • Visual Impact: Perfect for showcasing transformations, renovations, or any before-and-after scenarios in a visually compelling manner.

  • Interactive Experience: Users can manually slide to compare the before and after images, enhancing engagement.

  • Optimized Loading: Despite being a visual tool, the slider ensures quick load times, maintaining your website's speed and performance.

Conclusion:

Incorporating widgets into your website not only augments its functionality but also elevates the overall user experience. Elfsight's range of widgets offers Vsble website users a suite of tools designed for modern web needs. From enhancing interactivity with contact forms and audio players to ensuring regulatory compliance with age verification, these widgets are essentials for any forward-thinking website owner. Take the plunge and integrate these widgets to see a marked improvement in engagement and functionality on your site.

Maximizing Website Tracking and Conversions with Google Tag

· 21 min read
Natalia Vinogradova
Senior Blog Editor AT Vsble

Online Portfolio

Learn how to install Google Tag on your Vsble website and set up events for conversions to optimize your advertising strategy and gain valuable insights into user behavior.

Installing Google Tag​

Google Tag is a powerful tool that allows you to track and analyze visitor behavior on your website. By installing Google Tag, you can gain valuable insights into user engagement, conversion rates, and overall website performance. Here are the steps to install Google Tag on your website:

Access the 'integrations' section of your website's settings​

To install Google Tag, you first need to access the 'integrations' section of your website's settings. This section is usually located in the admin panel or backend of your website. Look for the 'integrations' or 'third-party tools' tab, where you can manage and configure various integrations for your website.

Look for the 'custom integrations' option​

Once you are in the 'integrations' section, look for the 'custom integrations' option. This option allows you to add tracking codes or scripts to your website. Google Tag is a custom integration that requires you to add a specific tracking code to your website in order to start monitoring visitor activity and collecting data.

Paste the Google Tag tracking code in the designated area​

After locating the 'custom integrations' option, you will see a designated area where you can paste the Google Tag tracking code. This code is provided by Google Tag and is unique to your website. Copy the tracking code from your Google Tag account and paste it into the designated area in your website's settings. Be sure to save the changes once you have pasted the tracking code.

Click on the 'save' button to apply the changes​

Once you have pasted the Google Tag tracking code in the designated area, click on the 'save' button to apply the changes. This will activate Google Tag on your website and start collecting data. It may take some time for the data to populate in your Google Tag account, so be patient and allow sufficient time for the system to gather information about your website visitors.

Installing Google Tag is an essential step in understanding the behavior of your website visitors and optimizing your online presence. By following these simple steps and pasting the tracking code in the designated area of your website's settings, you will unlock a wealth of data that can help you make informed decisions about your website's performance and user experience.

Setting Up Events for Conversions​

Tracking events on your website is essential for understanding user behavior and measuring the success of your marketing campaigns. By setting up events for conversions, you can gain valuable insights into how visitors interact with your site and identify areas for improvement. In this blog post, we will guide you through the process of setting up events for conversions using the Google Tag interface.

Access the Google Tag interface on your website​

To begin, you need to have access to the Google Tag interface on your website. This can be achieved by installing Google Tag Manager, a free tool that allows you to manage and deploy various tracking codes on your site.

Once you have access to the Google Tag interface, navigate to the 'events' or 'conversions' section. This is where you will define the specific events you want to track, such as button clicks or form submissions.

Define the specific events you want to track​

Think about the actions you want to monitor on your website that indicate a conversion. These could be button clicks, form submissions, video plays, or any other user interactions that are important to your business goals. Define these events in the Google Tag interface.

Configure the event parameters​

After defining the events, you need to configure the event parameters. This includes specifying the event category, action, and label. The category represents the overall classification of the event, the action describes what happened, and the label provides additional information or context.

Save the event settings to activate them​

Once you have configured the event parameters, save the event settings to activate them. This will enable Google Tag Manager to start tracking the specified events on your website.

Setting up events for conversions is an important step in understanding your website's performance and optimizing your marketing efforts. By accurately tracking user interactions, you can make informed decisions and improve the user experience on your site. With the help of the Google Tag interface, you can easily set up and manage these events, ensuring you have the data you need to drive conversions and achieve your business goals.

Benefits for Google Ads​

Google Ads is a powerful online advertising platform that allows businesses to reach their target audience and drive traffic to their websites. By investing in Google Ads, you can effectively measure the effectiveness of your advertising campaigns, identify which ads or keywords lead to conversions on your website, and optimize your advertising strategy to allocate your budget effectively.

Measure the effectiveness of your Google Ads campaigns​

One of the major benefits of using Google Ads is the ability to measure the effectiveness of your advertising campaigns. With Google Ads, you can track key metrics such as impressions, clicks, click-through rate (CTR), and conversion rate. These metrics provide valuable insights into the success of your ads and help you make data-driven decisions to improve your campaign performance.

By analyzing these metrics, you can identify which ads are generating the most clicks and conversions, and accordingly optimize your campaigns for better results. This allows you to focus your efforts and budget on the ads that are delivering the highest return on investment (ROI).

Identify which ads or keywords lead to conversions on your website​

Another advantage of using Google Ads is the ability to identify which specific ads or keywords are driving conversions on your website. By linking your Google Ads account to your website's analytics platform, you can track the actions users take after clicking on your ads, such as making a purchase or filling out a contact form.

This data gives you valuable insights into which ads or keywords are most effective in driving conversions. You can then optimize your campaign by focusing on the high-performing ads and keywords, and eliminate those that are not generating desired results. This helps you maximize your ROI and make informed decisions about where to allocate your advertising budget.

Optimize your advertising strategy and allocate budget effectively​

Google Ads offers various tools and features that allow you to optimize your advertising strategy and allocate your budget effectively. The platform provides detailed reports and analytics that can help you identify trends and patterns in your campaign performance. You can use this data to make informed decisions about your targeting, ad creatives, and bidding strategies.

For example, if you find that certain keywords have a higher conversion rate compared to others, you can allocate more of your budget towards those keywords to increase your chances of driving conversions. Similarly, if certain ads are performing exceptionally well, you can invest more in those ads to maximize their impact.

Additionally, Google Ads provides options for A/B testing, allowing you to test different ad variations and landing pages to determine what works best for your target audience. This iterative approach helps you refine your advertising strategy over time, ensuring that you are consistently improving your campaign performance and getting the most out of your advertising budget.

In conclusion, Google Ads offers several benefits to businesses, including the ability to measure the effectiveness of campaigns, identify high-performing ads or keywords, and optimize advertising strategies. By leveraging the power of Google Ads, businesses can maximize their ROI and achieve their advertising goals more efficiently.

Powerful Website Tracking and Analytics​

Gain detailed insights into user behavior and interactions on your website​

Website tracking and analytics allow you to gain valuable insights into user behavior and interactions on your website. By implementing tracking tools and analytics software, you can collect data on various aspects of user behavior, including how users navigate through your website, what actions they take, and how they engage with your content.

Tracking user behavior provides deep insights into the effectiveness of your website design, content, and user experience. It enables you to understand which pages are popular, how visitors move from one page to another, and what actions they perform, such as making a purchase or submitting a form. This information helps you identify patterns, trends, and areas for improvement.

Track various events, such as page views, clicks, downloads, and form submissions​

With website tracking and analytics, you can track a variety of events that occur on your website. These events include page views, clicks on specific elements, downloads of files or resources, and form submissions.

By tracking page views, you can determine which pages are attracting the most traffic and which ones may need optimization. Tracking clicks allows you to analyze how users engage with different elements on your site, such as buttons, links, and images. You can identify which elements are the most effective and which ones may require adjustments.

Tracking downloads provides insights into the popularity of your downloadable content, such as e-books, whitepapers, or software. It allows you to measure the success of your digital assets and refine your content strategy accordingly. Additionally, tracking form submissions helps you understand how users interact with your forms, providing insights into lead generation, user preferences, and potential areas for improvement in the user experience.

Understand how users engage with your website and identify areas for improvement​

One of the primary benefits of website tracking and analytics is the ability to understand how users engage with your website. By analyzing data such as time spent on different pages, bounce rates, and conversion rates, you can gain insights into user behavior at various stages of their journey.

Understanding how users navigate through your site helps you identify areas for improvement. For example, if users frequently abandon their shopping carts, you can investigate the checkout process to identify any barriers or friction points. By analyzing user interaction data and behavior patterns, you can make data-driven decisions to improve your website's usability, conversion rates, and overall user experience.

In conclusion, website tracking and analytics offer powerful tools to gain detailed insights into user behavior and interactions on your website. By tracking various events and analyzing user engagement, you can identify areas for improvement and make data-driven decisions to optimize your website's performance. With the ability to understand how users engage with your website, you can enhance user experience, increase conversions, and achieve your online goals.

Integrating Google Tag​

Google Tag is a powerful tool that allows website owners to track and analyze their website's traffic and user behavior. By integrating Google Tag into your website, you can gain valuable insights into how visitors interact with your site and make data-driven decisions to improve its performance. In this section, we will guide you through the process of integrating Google Tag into your website.

Access your website's settings or administration panel​

To start the integration process, you need to access your website's settings or administration panel. This is usually where you can find options to customize and manage your website's functionalities. The location and accessibility of the settings panel may vary depending on the platform or content management system (CMS) you are using. Look for a menu or a section that allows you to modify your website's settings.

Locate the 'integrations' or 'tracking' section​

Once you are in the settings or administration panel, navigate to the 'integrations' or 'tracking' section. This is where you can manage any external integrations or tracking codes for your website. The location and name of this section may differ based on your CMS or website builder.

Look for the option to add custom integrations​

Within the 'integrations' or 'tracking' section, look for the option to add custom integrations. This is the feature that allows you to add external scripts or code snippets to your website. The purpose of this step is to provide a designated area where you can insert the Google Tag tracking code.

Copy the Google Tag tracking code from your Google Tag account​

Now, log in to your Google Tag account and locate the tracking code. It is a unique code snippet that identifies your website and enables Google Tag to collect data. Copy the tracking code from your Google Tag account, as you will need it for the next step.

Paste the code into the designated area on your website​

Return to your website's settings or administration panel and locate the designated area for inserting custom code snippets. Paste the Google Tag tracking code into this area. Ensure that no parts of the code are missing or altered during the process. This step is crucial for the proper functioning of Google Tag on your website.

Save the changes to complete the installation​

After pasting the Google Tag tracking code, save the changes to complete the installation. The specific method to save the changes may vary based on your CMS or website builder. Once saved, Google Tag will start tracking and analyzing user data on your website.

Congratulations! You have successfully integrated Google Tag into your website. This opens up a world of opportunities to gather actionable insights about your audience and enhance your website's performance. Keep in mind that it may take some time for the data to populate in your Google Tag account, so be patient and start exploring the possibilities of this powerful tool.

Setting Up Events for Conversions​

Setting up events for conversions is an essential step in tracking and measuring the effectiveness of your website. By implementing event tracking, you can gain valuable insights into user behavior and actions, enabling you to optimize your marketing strategies and improve overall conversions. Here's a step-by-step guide on how to set up events for conversions.

Step 1: Open the Google Tag Interface on Your Website​

To start setting up events, access the Google Tag Manager interface on your website. This powerful tool allows you to manage various tracking codes and implement event tracking without the need for complex coding.

Step 2: Find the Section Dedicated to Events or Conversions​

Navigate to the relevant section in the Google Tag Manager interface that is specifically designed for events or conversions. This section will enable you to define and customize the events you want to track.

Step 3: Define the Specific Events You Want to Track​

Identify the specific events that are most important to your business goals. These events can be anything from purchases and form submissions to newsletter sign-ups and video views. Defining these events will help you focus on the key actions that contribute to conversions.

Step 4: Customize the Event Parameters​

Customize the event parameters to provide detailed information about each event. These parameters typically include the event category, action, and label. The category describes the type of event, the action specifies the specific action taken by the user, and the label provides additional context or details.

Step 5: Save the Event Settings​

Once you have defined and customized your event parameters, save the event settings to activate them on your website. This step ensures that the events are properly tracked and recorded whenever the specified actions occur.

By following these steps and implementing event tracking, you can gain valuable insights into user behavior, optimize your marketing efforts, and boost conversions on your website. Remember to regularly review and analyze the event data to make data-driven decisions and continuously improve your conversion rates.

Benefits for Google Ads​

Google Ads is a powerful advertising platform that allows businesses to reach their target audience and promote their products or services effectively. It offers a variety of benefits that can help you measure the success of your campaigns, identify the ads or keywords that lead to conversions, and optimize your advertising strategy. In this blog section, we will explore these benefits in more detail.

Measure the success of your Google Ads campaigns​

With Google Ads, you can track and measure the performance of your campaigns in real-time. This means that you can easily identify which ads are driving the most clicks, impressions, and conversions. By analyzing this data, you can determine the effectiveness of your campaigns and make informed decisions about how to improve them.

Identify which ads or keywords lead to conversions on your website​

One of the main advantages of Google Ads is its ability to track conversions. By setting up conversion tracking, you can see which ads or keywords are driving the most valuable actions on your website, such as purchases, sign-ups, or downloads. This data is crucial for understanding your audience and tailoring your ads to reach the right people at the right time.

Optimize your advertising strategy and allocate budget effectively​

Google Ads provides valuable insights into the performance of your ads, allowing you to optimize your advertising strategy and allocate your budget effectively. By analyzing the data on click-through rates, conversion rates, and cost-per-click, you can make informed decisions about which keywords, ads, or campaigns to prioritize. This helps you maximize your return on investment and ensure that your advertising budget is being used wisely.

In conclusion, Google Ads offers a range of benefits that can help businesses measure the success of their campaigns, identify the most effective ads or keywords, and optimize their advertising strategy. By leveraging these advantages, businesses can reach their target audience more effectively and achieve their marketing objectives.

Conclusion​

In conclusion, implementing Google Tag on your website can provide you with valuable insights into user behavior and interactions. By tracking various events such as clicks, downloads, and form submissions, you can gain a deeper understanding of how users engage with your website.

To integrate Google Tag into your website, simply paste the provided tracking code into your website's HTML. This ensures that every interaction and event on your website is captured and recorded for analysis.

One of the major benefits of implementing Google Tag is the ability to optimize your Google Ads campaigns. With event tracking for conversions, you can track specific user actions that lead to conversions, such as a completed purchase, a form submission, or a sign-up. This data can then be used to fine-tune your Google Ads campaigns, ensuring that you're targeting the right audience and maximizing your return on investment.

By analyzing the data collected through Google Tag, you can gain insights into user behavior patterns and make data-driven decisions to improve your website's performance. For example, if you notice a high number of clicks on a particular button or link but a low conversion rate, you can optimize that element to better align with user expectations and increase conversions.

Overall, Google Tag is a powerful tool that allows you to track and analyze user interactions on your website. By gaining a deeper understanding of how users engage with your website, you can make informed decisions to improve user experience, optimize marketing campaigns, and drive better results for your business.

TL;DR​

Implementing Google Tag on your website helps you gain valuable insights into user behavior and interactions. It allows you to track events such as clicks, downloads, and form submissions. By easily integrating Google Tag using the provided tracking code, you can optimize your Google Ads campaigns for conversions. Analyzing the data collected through Google Tag enables you to make data-driven decisions to improve your website's performance and drive better results for your business.

Einrichten von Ereignissen für Conversions​

Das Einrichten von Ereignissen für Conversions ist ein unverzichtbarer Schritt, um die Effektivität deiner Website zu messen und zu verbessern. Mit Event-Tracking kannst du wertvolle Einblicke in das Verhalten und die Aktionen deiner Nutzer gewinnen, wodurch du deine Marketingstrategien gezielt optimieren und die Conversion-Rate steigern kannst. Hier findest du eine Schritt-für-Schritt-Anleitung zum Einrichten von Conversion-Ereignissen.

Schritt 1: Öffne die Google Tag-Oberfläche auf deiner Website​

Um mit dem Einrichten von Ereignissen zu beginnen, öffne die Benutzeroberfläche von Google Tag Manager auf deiner Website. Dieses leistungsstarke Tool ermöglicht es dir, verschiedene Tracking-Codes zu verwalten und Event-Tracking ohne tiefgreifende Programmierkenntnisse umzusetzen.

Schritt 2: Gehe zum Bereich für Ereignisse oder Conversions​

Navigiere zum entsprechenden Bereich in der Google Tag Manager-Oberfläche, der speziell für Ereignisse oder Conversions vorgesehen ist. Hier definierst und konfigurierst du die gewünschten Ereignisse.

Schritt 3: Definiere die spezifischen Ereignisse, die du verfolgen möchtest​

Identifiziere die für deine Geschäftsziele wichtigsten Ereignisse. Diese können Käufe, Formularübermittlungen, Newsletter-Anmeldungen, Videoaufrufe oder andere Interaktionen sein, die für deine Conversion-Strategie von Bedeutung sind. Durch die Definition dieser Ereignisse kannst du dich gezielt auf entscheidende Nutzeraktionen konzentrieren.

Schritt 4: Passe die Ereignisparameter individuell an​

Passe die Ereignisparameter an, um präzise Informationen über jede Interaktion zu erhalten. Zu den typischen Parametern gehören die Ereigniskategorie (z. B. „Formular“), die Aktion (z. B. „Abgesendet“) und die Beschriftung (z. B. „Kontaktformular oben“). Diese Angaben helfen dir, deine Daten später besser zu interpretieren und gezielt auszuwerten.

Schritt 5: Speichere die Ereigniseinstellungen​

Sobald du deine Ereignisparameter festgelegt und angepasst hast, speichere die Einstellungen, um die Ereignisse auf deiner Website zu aktivieren. Ab diesem Moment werden die festgelegten Aktionen zuverlässig erfasst und aufgezeichnet.

Durch die Einrichtung von Event-Tracking kannst du nachvollziehen, wie Besucher mit deiner Website interagieren, und auf Basis dieser Daten fundierte Optimierungsmaßnahmen ergreifen. Prüfe regelmäßig deine Ereignisdaten, um deine Conversions nachhaltig zu verbessern und deine Marketingziele zu erreichen.

Vorteile von Google Ads​

Google Ads ist eine äußerst leistungsfähige Werbeplattform, mit der Unternehmen gezielt ihre Zielgruppen erreichen und ihre Produkte oder Dienstleistungen effektiv bewerben können. Die Plattform bietet zahlreiche Vorteile, die dir helfen, den Erfolg deiner Kampagnen zu messen, leistungsstarke Anzeigen oder Keywords zu identifizieren und deine Werbestrategie zu optimieren. In diesem Abschnitt beleuchten wir diese Vorteile im Detail.

Messe den Erfolg deiner Google Ads-Kampagnen​

Mit Google Ads kannst du die Leistung deiner Kampagnen in Echtzeit überwachen. Das bedeutet, dass du schnell erkennen kannst, welche Anzeigen die meisten Klicks, Impressionen und Conversions generieren. Durch die Analyse dieser Daten lässt sich der Erfolg deiner Kampagnen objektiv bewerten und verbessern.

Erkenne, welche Anzeigen oder Keywords zu Conversions führen​

Ein großer Vorteil von Google Ads ist das Conversion-Tracking. Damit kannst du genau nachvollziehen, welche Anzeigen oder Keywords zu wertvollen Aktionen auf deiner Website führen – etwa zu einem Kauf, einer Anmeldung oder einem Download. Dieses Wissen ist entscheidend, um deine Zielgruppe besser zu verstehen und deine Kampagnen auf die effektivsten Elemente auszurichten.

Optimiere deine Werbestrategie und nutze dein Budget gezielt​

Dank der detaillierten Analysen von Google Ads kannst du fundierte Entscheidungen zur Optimierung deiner Werbestrategie treffen und dein Budget effizient einsetzen. Die Auswertung von Klickraten, Konversionsraten und Kosten pro Klick zeigt dir, welche Kampagnen, Keywords oder Anzeigen besonders wirkungsvoll sind. So kannst du gezielt priorisieren und sicherstellen, dass dein Werbebudget dort zum Einsatz kommt, wo es die beste Wirkung erzielt.

Zusammenfassend lässt sich sagen, dass Google Ads zahlreiche Vorteile bietet – von der transparenten Erfolgsmessung über die Identifikation von Conversion-Treibern bis hin zur datenbasierten Optimierung deiner Werbemaßnahmen. Durch die gezielte Nutzung dieser Möglichkeiten kannst du deine Zielgruppe effizienter erreichen und deine Marketingziele erfolgreicher umsetzen.

Fazit​

Zusammenfassend bietet dir die Implementierung von Google Tag auf deiner Website wertvolle Einblicke in das Verhalten und die Interaktionen deiner Nutzer. Durch das Tracking von Ereignissen wie Klicks, Downloads und Formularübermittlungen erhältst du ein tieferes Verständnis dafür, wie Nutzer mit deiner Website umgehen.

Die Integration des Google Tag ist unkompliziert: Kopiere einfach den bereitgestellten Tracking-Code in den HTML-Code deiner Website. Dadurch wird sichergestellt, dass jede Interaktion und jedes Ereignis auf deiner Website erfasst und fĂĽr Analysen gespeichert wird.

Ein besonders großer Vorteil ist die Möglichkeit, deine Google Ads-Kampagnen gezielt zu optimieren. Mit Event-Tracking für Conversions kannst du konkrete Nutzeraktionen wie Käufe, Formularübermittlungen oder Anmeldungen nachverfolgen. Diese Daten kannst du nutzen, um deine Anzeigenstrategien anzupassen und die richtige Zielgruppe anzusprechen – für eine bessere Performance und höheren ROI.

Durch die Analyse der mit Google Tag gesammelten Daten kannst du Verhaltensmuster erkennen und datenbasierte Entscheidungen zur Verbesserung der Website treffen. Wenn du zum Beispiel feststellst, dass ein Button viele Klicks, aber kaum Conversions generiert, kannst du dessen Gestaltung oder Zielseite ĂĽberarbeiten, um bessere Ergebnisse zu erzielen.

Insgesamt ist Google Tag ein kraftvolles Werkzeug, mit dem du Nutzerinteraktionen analysieren und deine Website sowie deine Marketingkampagnen effektiv optimieren kannst. So triffst du fundierte Entscheidungen, verbesserst die Nutzererfahrung und erzielst messbare Erfolge fĂĽr dein Unternehmen.

TL;DR​

Die Implementierung von Google Tag auf deiner Website hilft dir, wertvolle Einblicke in das Nutzerverhalten zu gewinnen. Du kannst Ereignisse wie Klicks, Downloads und FormularĂĽbermittlungen verfolgen. Durch die einfache Integration des Tracking-Codes optimierst du deine Google Ads-Kampagnen gezielt auf Conversions. Die analysierten Daten helfen dir, fundierte Entscheidungen zu treffen, die Website-Performance zu verbessern und bessere Ergebnisse zu erzielen.